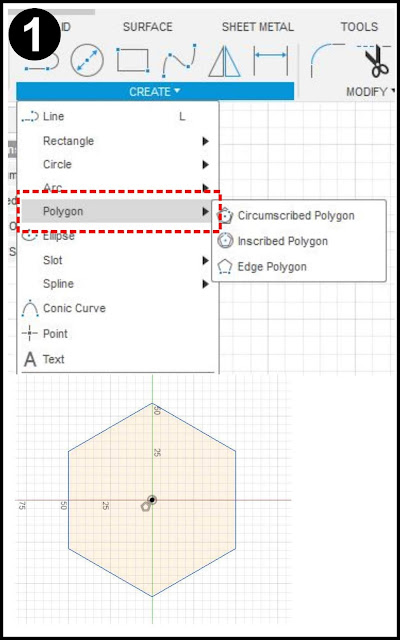
(1) SKETCH a POLYGON
Start a SKETCH and under CREATE, select the POLYGON option. The Circumscribed and Inscribed options work well. Set the number of sides. Click OK when done, then click FINISH SKETCH to exit the sketch mode. |
| Sketch a POLYGON. |
(2) EXTRUDE with NEGATIVE TAPERS
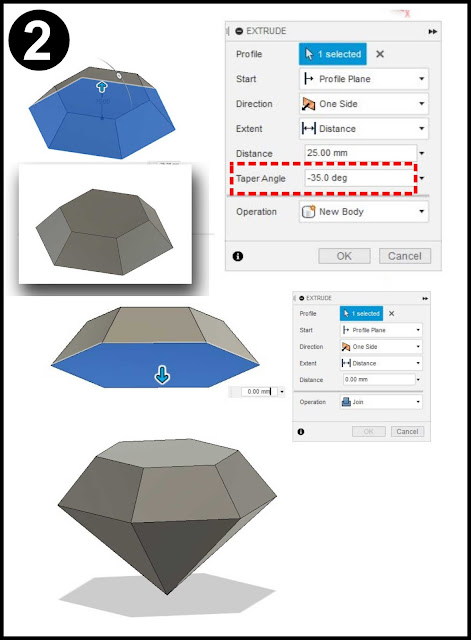
Make the TOP: Select the EXTRUDE command. Click on the polygon sketch and pull the extrusion upward to create the top part of the gem. Set the TAPER ANGLE to a negative value. Smaller values will leave a flat top on the gem, higher values willcreate a pointed top. Click OK when you like the shape.
Repeat for Bottom: Select the bottom surface of the new body you just created. Click EXTRUDE again, but this time pull downwards. Again, set the TAPER to a negative number and click OK when you like the look.
 |
| Extrude the polygon and use a negative value for the TAPER. Create a second extrusion in the opposite direction. Notice how different negative values result in different shapes for your gem. |
(3) Appearance and Render
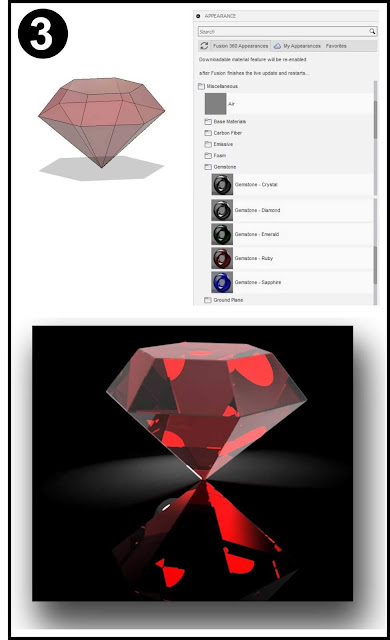
Open the APPEARANCES menu (type "A") and go to the MISCELLANEOUS folder and select the GEMSTONE sub-folder. Drag the material onto the body. Go to the RENDER workspace, set your view and click on the In-Canvas render button. |
| Use the APPERANCE menu to assign a material from the Miscellaneous/Gemstones folder. |
Printable Version of This Tutorial
 |
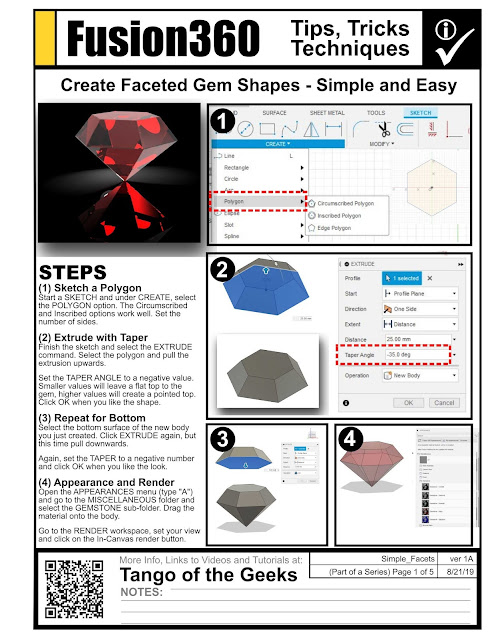
| Print this free guide to making faceted gems in Fusion 360. |
to Learn How to Make Even More Complex Faceted Shapes and
Check out all of our Fusion 360 Tips, Tricks and Tutorials.
As an Amazon Associate I earn from qualifying purchases.
Shop through our Amazon links to help support this site.
Shop through our Amazon links to help support this site.
Also find me on:
No comments:
Post a Comment