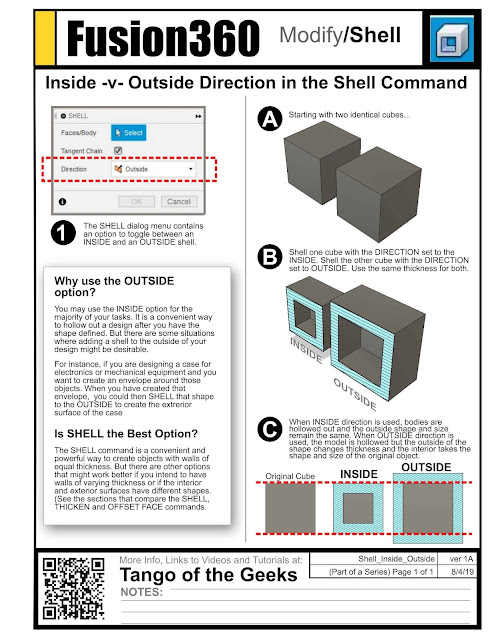
If you choose OUTSIDE then Fusion will add a wall outside of the existing shape and the original geometry will become the hollow interior. This is useful for making casting molds or to maintain clearance when designing cases and enclosures.
To understand the difference between the two options, start with
two identical cubes. You can make these with an extruded sketch or use the built in BOX primitive under the CREATE menu.
Apply an INSIDE shell to one of the cubes and the OUTSIDE shell to the other cube.
Notice the results:
- The INSIDE option keeps the original shape as the exterior of the resulting object. A wall of uniform thickness is created on the interior.
- The OUTSIDE option creates the interior cavity with the shape of the original object and applies a uniformly thick wall around it.
I use the INSIDE option most frequently, but the OUTSIDE option has some very powerful uses:
- Create casting molds for the original shape
- Put an exterior skin on a case or enclosure
- Creating foam cutout for packing and padding
 |
| Download the image and print on A4 or Letter paper for a quick cheatsheet. |
See all sheets on the SHELL COMMAND or take a look at
All of our Fusion 360 Tips, Tricks and Tutorials.
Also find me on:


