Disclaimer and Social

This page may contain affiliate links. As an Amazon Associate I earn from qualifying purchases.

Thursday, August 27, 2020

Control a Bare LCD with Just an Arduino

Yes, you can control simple bare-bones LCD displays using just an Arduino. No driver boards or additional chips are required. If you have controlled a 7-segment LED display directly from an Arduino, you can do the same with an LCD. 

However, there are a few tricks to doing it correctly. It's easy really. But I was trying to do it with mystery, undocumented displays. As you might guess, much fun and hilarity ensued.

Power control and drive a bare LCD with an Arduino
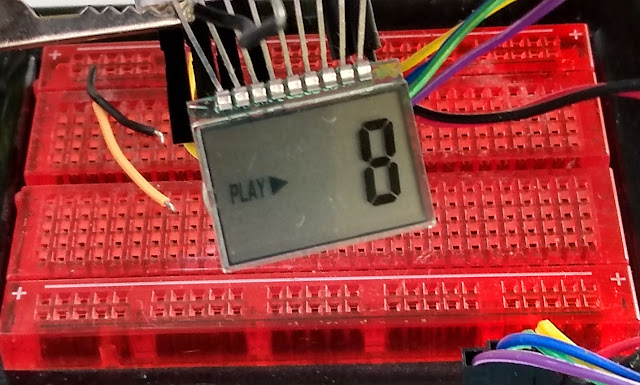
This LCD is being controlled with just an Arduino. There are no additional chips or driver boards, just the bare LCD and an Arduino. The LCD was scavenged from an old CD player. It has a 7-segment display as well as icons and animations. Using salvaged LCD screens can lead to all sorts of surprises. This tiny display, with only nine pins, is actually quite complex to control. It has multiple layers of displays that are controlled by changing which pin you use as the common pin.


Why a Bare LCD

I have plenty of working LCD displays in all sizes and types. They are easy to hook up and simple to control with an Arduino. Why would I want to use a bare LCD instead? 

Well, because I have them and because I didn't know how to use them. It was a challenge.

Over the years I have scavenged a large collection of LCD displays out of broken electronic devices. They still worked when I salvaged them, but I had no idea how to
Monday, August 17, 2020

DIY Two-Needle Dial with Arduino

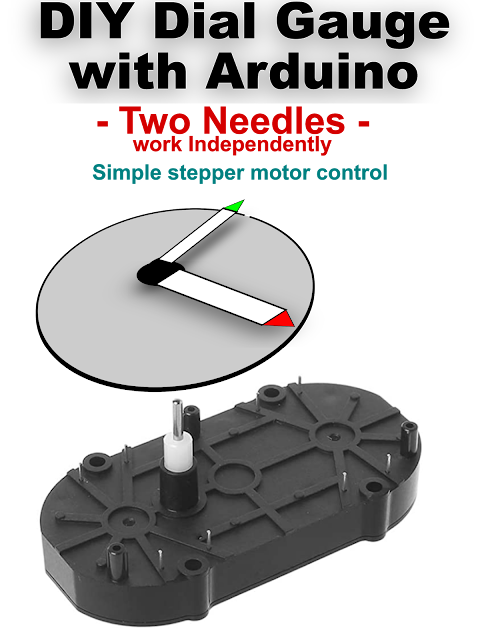
Just learned about a great device called a "Biaxial Stepper Motor." It's a pair of stepper motors driving two separate shafts that are nested concentrically inside of each other. This allows you to mount two indicator needles, one on each shaft, and operate them independently.

It functions something like the shafts that move the hands of a clock, but with one very important difference. 

two hand dial gauge for arduino with dual independent needle working with biaxial stepper for sim games
You can easily make a dial or gauge for your flight sim or other game. These biaxial stepper motors move each needle arm independently. Each hand can rotate at different speeds or directions. Easy to control with any Arduino or Raspberry Pi.


In a clock, all the shafts are linked by gears and they rotate with a set ratio (for example: the hour hand moves 1/12th of a rotation for every full rotation of the minute hand). Wikipedia calls the gearing mechanism a "wheel train" (note the illustration) with the "hand shafts" being the part attached to and  moving the hands.

By contrast, the two shafts of a biaxial stepper operate completely independently, so you can

Wednesday, August 5, 2020

Slow Filling Gas on Simplicity Riding Mower

PROBLEM: Slow filling gas tank on a Simplicity riding mower. 
SOLUTION: Park the mower with the nose pointing downwards on a slope.

This is not a "fix" for the problem, more of a workaround. But the only real solution I have found is an online post saying the gas tank needs to be replaced with an improved version. The owner of the mower is not going to do that, so I figured out this workaround.

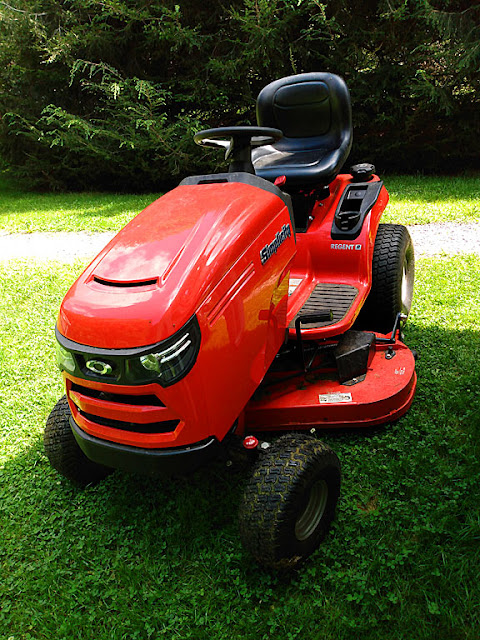
It's a Simplicity Regent S with a 48" deck that they purchased in 2019. The problem seems to be that the fill-neck is constricted to about a 1/4" where it joins the tank. When you pour the fuel in too quickly (normal speed) the passageway becomes vapor locked and you can't put more fuel in until the the neck empties. This can take several seconds or even minutes. If you shake the mower, you can break the vapor lock, but that's a pain. It can take 10-15 minutes to fill the mower.

Simplicity regent riding mower slow filling gas tank
Park the Simplicity mower with its nose pointed downhill. This can make filling the gas tank happen more quickly. Even a slight slope helps, but a nice 15 degree slopes really helps speed up filling the tank .On a flat slope the gas goes in too slowly. Be sure to use your parking brake.


I thought I must be doing something wrong, so I checked