WHY?
Sure, even without utilizing the REST option you can use contact sets and make one object push another object out of the way. But the moved object stays in the new location. It does not return to its original position. If a cam pushes a rod up, the rod stays up and never returns to its lower position. A latch pin can be pushed out of the slot, but it will not automatically slide into the locked position
But when the REST option is used, the object does return to its original position. The REST option basically tells Fusion to always return that object to its original resting position. The REST option works with all joint types, so you can create a self-centering joystick, a slide that returns to bottom, a spring-loaded pin or a combination.
I've always used this technique in combination with contact sets, but it does work with basic joints too. I use the contact sets to create the interaction between the objects, then create a resting position to make sure the moved object returns to the desired position when the contact set's influence ends. However, you can create a joint without contact sets, a simple pendulum for example, and the object will return to resting position when you release the mouse after moving it. (Note: This changes the way the "Capture Position" option works.)
 |
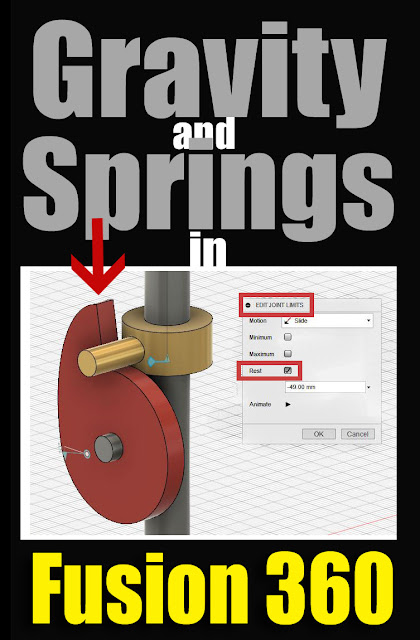
| Use the "REST" option in the "Edit Joint Limits" menu along with contact sets to apply, or at least mimic, the effect of gravity or springs in Fusion 360 models and animations. |
SETTING the REST POSITION:
- Open the JOINTS folder in the object browser
- Find the Joint you want to have a Resting Position
- Start the "Edit Joint Limits" dialog by:
a) Right-clicking and selecting from the menu
b) or hover over the joint and select the icon to the right of the joint name.
- Select the REST check box
- When selected, an option to enter the location of the REST or "home" position appears
- The type of value changes depending on the joint type (ex: sliders use a distance, rotating joints (revolutes) use degrees
- I try to design the model so that the object's original or current position is the resting position. But you can enter any functional positive or negative value.
- Notice that you can drag the object using the triangle-flag icon that appears
- Click OK
Now, the "Rested" component will try to return to the home-position whenever the contact surface stops pushing it out of the way. The affect happens quickly, much like having a spring applied to it.
The REST option is an excellent way to model assembly joints, but it does have limits.
- Objects do not bounce.
- There is no decay, so pendulums return instantly to center instead of swinging in smaller arcs
- There is no acceleration/deceleration.
- There is no friction or speed options that I know of.
- It does not deform modeled springs or levers.
So it's definitely not a full kinematics modeler and the interaction is very simple. But overall it's a very useful technique that is worth remembering.
Check out all of our Fusion 360 Tips, Tricks and Tutorials
As an Amazon Associate I earn from qualifying purchases.
Shop through our Amazon links to help support this site.
Shop through our Amazon links to help support this site.
Also find me on:

