I started using washers in jewelry projects because they are perfect sizes to cover NeoPixel rings. I started putting the bright NeoPixel LEDs into jewelry before I had a 3d printer. I liked the results and even published an Instructable on how I made one. As you can tell from the photos, I needed something to cover the NeoPixels with since they are so bright.
(I've also used washers in other non-jewelry projects like my welded washer bowl.)
Finding square and rectangular covers is easy, you can make attractive jewelry with a variety of materials. Squares and rectangles are also easy to cut or fabricate. But making perfect circles, especially concentric circles - well that's harder and often very tedious and time consuming. That's why I defaulted to washers at first.
I spray painted a few and used nail polish on others. When I added some bling the washers kind of worked as jewelry. But I still wanted something else, that little something extra. I kept seeing paper and cloth that I likes and kept wishing I could somehow get them onto the washer. But cutting them to fit would be a pain.
Then I remembered I had a craft cutter -Duh!!! - that's why I got the Silhouette Cameo in the first place.
 |
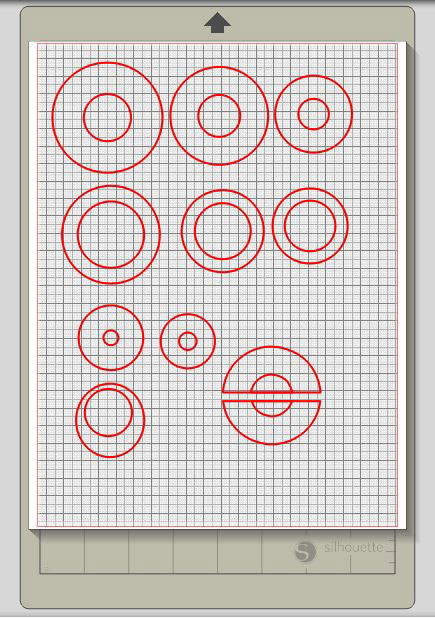
| The Silhouette design software made it easy to create a template. Notice that I also included some half-rounds, insets and off-center parts. This gave me a lot of options to work with. |
So I decided to make some paper circles with a Silhouette Cameo craft cutter machine (I so smart). I measured the washers and used those dimensions to draw circles in the Silhouette design software. I drew circles for several of the washer sizes. And I added some half-rounds, some offset and off-center versions as well. That way I have a variety of shapes to play with and overlay on top of each other.
It worked, a few minutes later I had a large selection of paper circles to use. I played with them for days. And of course I had to add bling, extra paint and glitter to some of them.
One thing I liked about this technique is the randomness of the result. You can use the design software to place the cuts exactly where you want. But letting the cuts fall wherever all random and weird, that gave me a treasure trove of chaotic suggestions.
I have a least several hundred paper circles left. I'm not sure how many more pieces of jewelry I'll create with this technique (at least for this year). But I wanted to document and share the technique before it got buried and forgotten somewhere in the studio.
Plus, now that I have a 3d printer I've started to play with creating custom shells for the jewelry, so I might not get back to this technique for quite a while.


No comments:
Post a Comment